Sewing a Fur Collar

First of all, thank you so much for the many wonderful comments on my coat.  You made my week.

Now it’s time for me to give back to you and share some of the techniques.  Let’s start with how to sew a fur collar, and next I’ll do a post on pad-stitching.  It had been a few years (like 30) since I made a fur collar which required me to do a little research and to think through the process.

Starting with the end:

The fur – a piece of dyed lambswool approximately 24 x 24″.

Dyed Lambswool

Fur Alert!

The following steps resulted in small green fibers of fur in every corner of our house.  You’d have thought I had a fluffy shedding pet who followed me around the house.  Ugh!

Tutorial:

1.  Select the piece of the fur from which you wish to cut the collar.  All fur is not created equal – some parts of the pelt were clearly not usable as the fur was sparse or just didn’t look good, and I hoped to have enough left for cuffs.

2.  When planning for the collar, if the pattern doesn’t have an upper collar piece which is larger than the under collar, increase the length and the width of the upper collar by approximately 1/2″.  You will need this additional fabric so the collar turns well and to keep the fur visible and the under collar not visible.

3. Using a pointed scissors, cut the collar from the back side of the fur, only cutting through the pelt or fur backing.  The fur fibers will separate without the help of a scissors.

4.  As you plan to sew the upper and the under collar,  for the width of the seam allowance, cut away the fur from the pelt or backing.  Note: Do not cut away the actual seam allowance.  This step reduces bulk when sewing the upper to the under collar.

Fur is cut away but NOT the pelt

5.  Pin the upper and under collar together.  Baste if you are so inclined.  For leather you will need to pin in the seam allowance.

6.  Sew the upper and under collar per the pattern instructions.

7.  Before you trim the seam, turn the collar right side out.  Use a pin or needle and pick out the fur fibers that got caught in the seam.  If you don’t take this step, your collar will look like this:

Use a pin to pull out any fur fibers which are caught in the seam

8.  Trim the seam in the same way as if you are working with fabric only

9.  Now turn the collar and press.  This was quite challenging for me as I didn’t want to burn the delicate lambswool.  Good thing is that it didn’t need much pressing.

Back side of the turned collar.

Now continue with your coat or garment construction.

My New Coat: Marfy 1974

With great pride, I wish to share with you my beautiful new coat from Marfy pattern #1974:

Fabric:

  • Taupe wool jacquard from Pendleton
  • Underlined with polished wool – i.e. men’s plaid suit fabric
  • Faced with brown wool
  • Trimmed with lambswool
  • Lined with Asian print, underlined with cotton gauze

Consistent with Marfy’s approach to provide pattern pieces without instructions, the following is a photo diary of the process.  Besides, this post is for my kindrid spirit whose wish to see the details more than to hear the story.  Enjoy!

Construction:

Underlined with polished wool and linen for shoulder stabilization
Welt pockets
Bound buttonholes
Velvet pockets
Fur collar with stand

Resulted in:

Back
Back yoke detail
Collar stand
Bound buttonhole
Facing, window for inside of buttonhole, velvet piping
Bone buttons and lining
Fur cuff
One more time

Thank you for visiting.

When I am an Old Woman I Shall Wear Purple – Unless I can Wear Cashmere

Having completed one coat this winter which didn’t wasn’t the ideal project, my need for mastery has kicked in, resulting in a decision to accelerate the plan to sew a wool coat for moi.  I love the cut of Simplicity’s Project Runway 2812 pattern and I  need a new wool coat but had planned to wait until next fall to take on this project.  Purple or royal blue were my colors of choice; black wool is easy to come by and black coats look great but this time I wanted color.  Maybe my desire to reject symbols of aging is related to my impending retirement or who knows?  No need to analyze but at least you know where my head is at these days.

Last week I searched the internet and sent for a few samples but on Friday I decided to make a run to London Textiles in New Jersey to take a look at their selection of coating.  London Textiles is a designer fabric wholesaler whose doors are thankfully open to the public.  If you’re even in the Philadelphia area on a weekday, I’d highly recommend a visit.  Their prices are amazing and they have bins of roll ends capable of enchanting a fabriholic serious sewer.

Purple or Royal vs Black Cashmere Coating

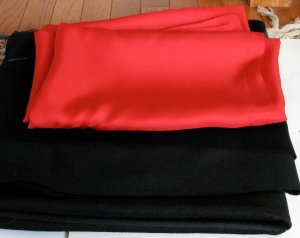
Not surprisingly, there were gorgeous coat-weight wools but no purple or royal blue.  Oh, but there was that roll of black Italian 100% cashmere that kept following me around the warehouse.  What’s more, the price was unbelievable – for cashmere that is.  I wandered around the store looking at gorgeous fabrics in search of the perfect silk lining and there it was – deep red silk.  The deal was sealed!  What an exciting find and how fun much fun will it be to work on cashmere.

Soon I will start indulging in this rich, luscious fabric.


Other Finds:

Stretch denim for a pair of Jalie jeans, navy wool knit for a cardigan, black wool gauze to use as an interlining for the coat.

My question for you:

What type of buttons should I use on this coat?  Leave me a comment with your suggestion – either a general suggestion or a specific button.  Also, if you’ve worked on cashmere, I’d love to hear your tips on interfacing, underlining, etc.

The Coat that Didn’t Want to Be

Oh, how the temptation of beautiful yet inexpensive fabric can be the start of a bad idea.  In the past few months I’ve gotten a major lesson on how not to make a coat.  The impulse idea started on a trip to Jomar, where I saw a really large bolt of lovely basket-weave wool coating in a light teal – Megan’s favorite color.  When I say “large”, I mean that it was 30″ in diameter.  That should have been the first clue but the little devil in my head said “buy it, Megan will love it”.  After all she lives in Minneapolis where you need a really warm winter outer garment.  I hadn’t sewed a coat in years and was eager to give it a go.


On a nearby table I found a bolt of burgundy Asian-design satin which would make the perfect lining.  The deal was sealed.  I walked out of the store with a massive yellow bag of fabric and less than a $50 drain on my wallet.  Not bad.


Before I whine too much, here’s a photo of the finished coat.  Megan was absolutely thrilled which of course, made it a worthwhile project.  In fact, today I received a thank you note in the mail with something like “I loooooooooove my new coat”.

Q. What went wrong?

A. Everything.

1. Underlining with haircloth.  Because the wool didn’t have much structure (truthfully because I wanted to try haircloth) I hand-stitched haircloth to each piece of the garment, minus the seam lines.  Doesn’t it feel good to brainlessly hand-stitch while watching a movie or two? Later when the sleeves looked like Hulk Hogan’s arms, I removed the underlining from the sleeves.  What was I thinking?

2. Underlining with haircloth. That stuff is itchy beyond anything I’ve ever experienced.  It provides structure but those little fibers are mean-spirited.   Fearful that the hair would poke through the lining and drive Megan crazy, I underlined the lining with a layer of a densely woven lightweight silk from my stash.  That seemed to work well but it was an unexpected additional step.


3. Buttonholes: With this thick fabric, choosing a buttonhole style was quite a feat.  After failing with bound and machine sewed buttonholes, I sought advice from my fellow sewists on PatternReview.com. I might add that the sample bound buttonholes were a most ridiculous looking specimen with big bulges because of the volume of fabric.  In the end, I used a technique called Spanish Snap Buttonholes.  The Sewing Lawyer has a terrific tutorial which was very easy to follow.  Instead of using wool, I used the lining to back the buttonholes, which provided a nice design element.  Honestly, it might have been the only suitable option.

Buttonhole or a weak smile?

4. Buttons with irregular edges and shapes: Because the chosen buttons had uneven edges, I worried about the buttons shredding the satin lining around the buttonholes.  To mitigate this, I dyed a piece of silk organza to match the lining, and added the organza as an additional layer over the satin lining pieces.  In addition I sanded the bottom of the buttons, which were composed of some type of recycled material.  Also, one button was about twice as thick as the others and wouldn’t go through the buttonhole.  Lucky that six were purchased and five were needed.


5. Sizing: For some reason the coat came out much larger than the lining, even though both were cut from the same pattern pieces.  I think the wool stretched even though it was underlined.  This threw me over the edge.  I quit working on the coat and spent about 2 weeks making leggings and other clothing for my 2 GD.  At least I knew what I was doing.  After I was over my huff, I made the needed alterations, again sewing through those thick seams. In the end the coat sizing matched the lining.  Whew!

6. The Collar: As I mentioned previously, the fabric was too thick for either of my sewing machines.  In addition there was gathering in the collar which made it even thicker.  I ended up hand sewing the lining to the collar.  It looks good – hope it wears well.

All worked out in the end.  What advice can you offer me?