This blog has been latent however today I found a need to use a URL to post a photo to another website. The quickest way to do this was to post it here so here’s the photo and directions on how to convert a vintage shop turtleneck sweater into a V-neck.
Converting a Turtleneck sweater to a V-neck
My husband loves lightweight wool V-neck sweaters, which are increasingly difficult to find, even at second-hand shops. So when I found this grey wool turtleneck (sorry, no photo so you’ll need to trust me), I was sure it had a future as a V-neck.
Steps:
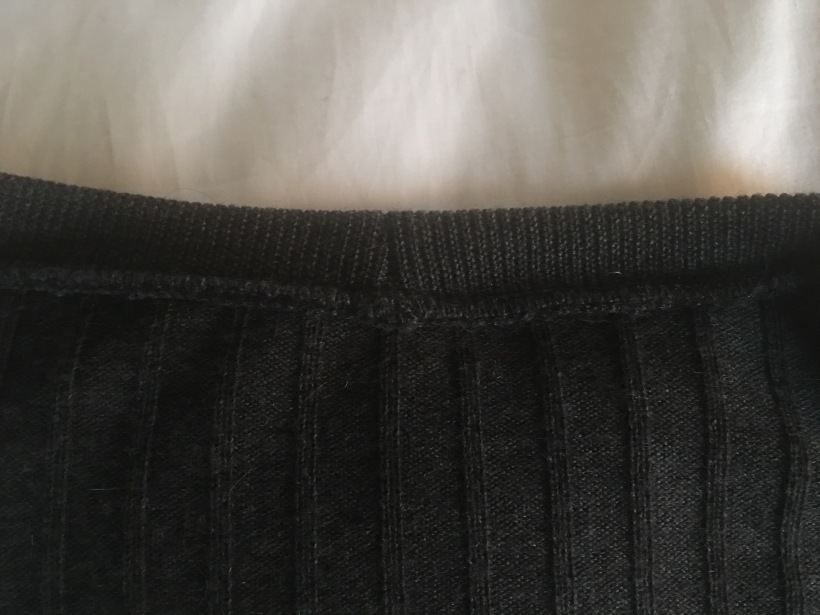
Remove turtleneck
Cut 2 binding strips 2″ wide.
Now determine the size of the V-neck and cut opening
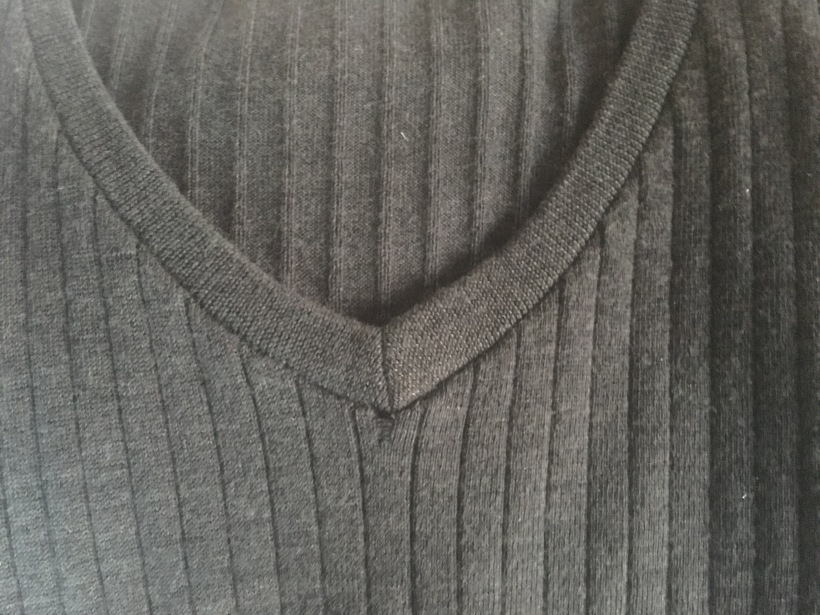
With the 2 strips of binding laying flat, create the miter and sew the front V
Sew the 2 strips together for center back (CB)
Pin binding to neckline and machine baste
Sew front V binding with a standard sewing machine (as for any V-neck binding)
Audition the binding to assure it is the correct length. If not, adjust at CB.
Serge or zig-zag the binding to the sweater.
That’s it. Here are a few photos of the finished product. I noticed that the stitch at the bottom of the V has pulled out so I’ll take a hand stitch to fix that. Not unexpected after about 6 or 7 years of wear. Otherwise this sweater still looks great.
We’ve all been in the situation where we have a garment we absolutely love but it’s too small. In the case of a T-shirt, there are few ways for the garment to be enlarged and yet fashionable. That’s what most of us sewists think, anyway, but for my 11 year old creative GD, she created a way to enlarge a favorite shirt and my job was to make the alterations. Here’s the story.
The Back-Story
Last summer, Mira and her mother were shopping at a second-hand store when Mira found a shirt she loved. Although when she tried it on, it was barely large enough for her, much less having the required wearing ease and length. Despite the fitting issues (and there was always an opportunity to give it to younger sister Caitlyn), they purchased the shirt for a few dollars.
Unfortunately I didn’t have the sense to take a before photo, so bear with me.
On separate occasions, Mira’s mother Angela, and Mira told me about the beloved shirt. Angela said she didn’t think I could alter it but maybe I could make a pattern from the shirt. Mira said “Mom doesn’t understand what I mean” and proceeded to describe the alterations she wanted.
The “after” photo.
The Alterations
The fabric was similar to a slinky fabric – a four-way stretch poly or jersey, so for the alterations I used navy jersey, to give a similar stretch to the garment. First I removed the sleeves and opened up the sides of the shirt, the sleeve seam, copied the pattern and then made the following 4 alterations:
1, Widen the shoulders – cut (lengthwise on the fabric) pieces of navy fabric a little longer than the armscye and 1-1/2″ wide, and then sewed it to each armscye.
2. Add to circumference to the top,cut (lengthwise on the fabric) two pieces of navy fabric the length of the top by 1-1/2″ wide, and sewed it to the front and back side seams, creating a navy stripe down the side of the shirt.
3. Add arm circumference,cut (lengthwise on the fabric) and sewed two pieces of navy fabric 1″ wide and the length of the sleeve underarm seam. As you can see above, this alteration isn’t visible unless the arm is lifted.
4. Shirt length –cut one piece (across the grain) of navy, 2-1/2″ wide by the circumference of the shirt. Sew onto the bottom. I left the bottom unfinished.
Once again, here is the result, with a not quite finished shirt I made from the pattern I lifted from the design. In the end, the shoulders were widened, the circumference was increased by 2″ and the length was increased 2″. A real success, though it doesn’t look as great in the photos as when wearing it.
What this shows me is that sometimes I need to think outside the box. Now I know that this method could be used to alter other types of t-shirts that are a size (or two) too small.