Sewing with Pre-ruffled Fabric: Part 2

IKEA Fabric for Valances and Pillows

In the two weeks since my last post, Kevin and I took a road trip to Wisconsin and Minnesota where we visited family and friends, and we saw Megan and Chris’s new home.  All of those miles traveled and I didn’t visit a single fabric store.  Well, just one.  However Megan and I did purchase fabric for window valances at IKEA.  Though the supply is limited, they have great fabric.

More tips for sewing with pre-ruffled fabric:

As I mentioned in the last post, sewing with pre-ruffled fabric was more challenging than I anticipated.  I stopped with tip #7, “Plan for where the ruffles will land on the garment”.  When cutting the black and white tank, I laid the pattern on the center front of the neck so that the entire ruffle would be visible.  That was the correct way to cut, unlike Deb’s tank where I cut in the middle of the ruffle.

Ruffle at center front of neckline is positioned correctly

In the following, I didn’t plan well and cut through the ruffle.  Fortunately I was able to recover by adding a piece of ruffle to the neckline before binding the edge.

Center front ruffle was cut away. Oops, but a little patch fixed it.

8.  Like with other stretchy garments, sew a small piece of stretch fabric or clear elastic into the shoulder seam.  Because the fabric is so lightweight and to avoid bulk, I didn’t extend the stabilizing fabric to the edges.  My choice was a small strip of cotton jersey.

9.  To bind the edges, use a very light weight fabric.  Again, I used cotton jersey with 4-way stretch.  BTW, white looked awful on the black and white fabric.

Sewing a strip of neck binding
Turn the binding over and topstitch
Another binding: 1" wide fabric was folded and serged onto the dress. No topstitching.

When the garments we sew are worn, we always learn more about our creations.  And thus a few more tips:

10.  When planning for an adult skirt, cut the fabric width approximately the same size as the wearer’s hip measurement.  Children don’t mind having a little extra bulk on their hips but it’s not as flattering for adults.  (I am now making this adjustment to Angela’s and Megan’s skirts).

11. Last of all, I learned that some of these fabrics may not work for children’s clothes.  At age 5, Catie proudly wore her new skirt to the playground.  After she went down the slide a few times the edge of the ruffles started to ravel (or unravel if you chose).  I don’t know if this would occur with the more commonly available poly or poly/nylon pre-ruffled fabric (i.e. black and white tank).  The grey ruffles feel like they are made from rayon, are softer and less stable.  It’s hard to be sad about the skirt as it was fun to sew it.   I’ll make her a new one from the yet unused black fabric.

Did I mention that  I paid $8.00 for all of the fabric for these garments.  It was great fun to find such cute fabric for such a bargain and to plan for the garments; but it was frustrating at times until I learned the nuances of working with pre-ruffled fabric.  

What are your experiences in working with this fabric?

Ruffled by Pre-ruffled Fabric

For some months I have been enamored by the pre-ruffled fabric which is common in ready-to-wear garments and which is sometimes but not often seen in the sewing circles.  Surely it’s not a product I’ve been able to find at the name-brand sewing and craft stores.  So when I found four pieces of pre-ruffled fabric in a bin at Jomar’s recent half-price sale, I was thrilled.  That is until I began to make garments from it.

Since I struggled to learn how to work with this unusual fabric, it’s only fair to share some tips with you. With about four yards of fabric in hand and because several pieces were 72″ wide, I was able to make one garment for each of the girls in our family – six in all.  So now we’re all dressed in grey and black.

Cate's skirt - wide twill elastic on a single piece of rectangular fabric.
Mira's jumper/sleeveless dress. Learned that its tough to make anything other than a straight skirt.
My tank top. Edges are finished with black jersey.
Deb's tank top. This is tapered but the effect is lost with the ruffles.
Angela's skirt - slightly longer. Waistband of black wide elastic.
Megan's skirt. Yoke top made from black jersey and has 3/4" elastic at the waist (no zipper)

10 Tips for Sewing with Pre-ruffled Fabric:

1. Use simple designs, preferable with straight lines.  The easiest and best look is to cut a rectangle of fabric and add a waistband to the fabric.  Absolutely avoid darts or multiple seams.  Even a tapered tank was more design than this fabric could handle.

2.  Pin the ruffles in place prior to cutting as it’s really easy to remove a part of a ruffle that you’ll want later.

For this skirt, I sewed the elastic and then pinned the ruffles in place before cutting.

3. Because the backing fabric is made from nylon knit (think nylon stockings), it runs.  Avoid pulling the fabric.  Even removing stitches created runs in the fabric.

4.  Machine baste all seams before placing the final seam (yes, that means all).  I made the mistake of trying to sew the edging without basting first.  When I removed the stitching it was a real mess.

5. Plan for the garment to be longer than you desire.  Shortening is easy – just cut the nylon backing between the ruffles.  Couldn’t be easier.

Fabric back - easy to hem by cutting away what you don't need. No other finishing is required.

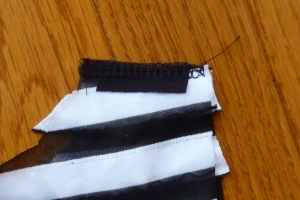
6. When cutting, match the stripes perfectly.

7. Plan for where the ruffles will land on the garment.  Here’s an example of a time when I cut away part of the ruffle.

Center front ruffle was cut away. Oops, but a little patch fixed it.

I have more, but since the hosting site isn’t cooperating, I’ll have more tips in the next post.  Stay tuned!

Post-publication note:  Part 2 is here