In the N. Hemisphere it’s winter and that means it’s time for females to cover their legs. Well, maybe not all females; even in the depths of winter we all see young women and teens with bare legs but not me.
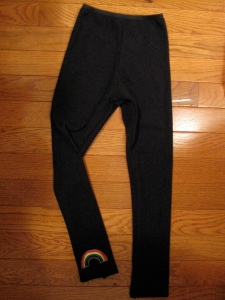
So I say it’s time for leggings; a fast sewing, get results in minutes item for the winter, mostly for my granddaughters but also for my daughters. I’m talking about the footless “tights alternative” as opposed to the ever popular leggings which are more of a “pants alternative”. The web is full of photos and comments about whether it is appropriate to wear leggings in lieu of pants. Rest easy in that we’re not touching that fashion controversy in this post.
My 2 GD’s absolutely love the leggings I make for them. They wear them as tights under skirts or dresses and as an additional layer under pants, especially during very cold weather. Since they’re inexpensive and very easy to sew, I often make 8 or 10 pair at a time and they are delighted when I arrive with package in hand.
Leggings Tutorial and Leggings Pattern (pdf)
Materials:
- Length of 2-way or 4-way stretch knit fabric. I often use spandex or lycra which would be used for leotards or dance-wear but also use other cotton or cotton-poly stretch knits, often to match a t-shirt or top.
- Leggings pattern (pdf)
- Narrow lingerie elastic for the waist
Notes:
The pattern is a size 2-4. In order to make a larger size (girth), split the pattern down the middle and add 1/2-3/4″, depending on the amount of adjustment needed. This works well great for girls who need a little more sizing but no more length.
To make a size larger such as a size 4-5, make the same split down the center of the pattern piece and add as much length as you need. No worries if you make it too long, you can just cut the bottom off later.
Cutting:
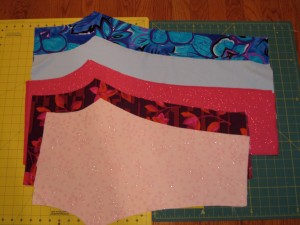
- Cut 2 identical pieces from the pattern.
- Generally when cutting fabric I try to avoid the need to cut against the grain, for leggings you want to have the greatest stretch across the garment, not lengthwise so the leggings are comfortable with movement.
- If possible, cut with a rotary cutter. It goes much faster and makes a nice clean-cut at the bottom.
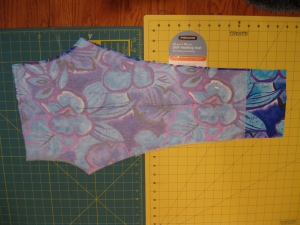 Here is my mass production – 3 pair for my Mira and 2 for Cate. Yes, there will be comparing when I arrive with clothes in hand but I’ll make sure they each have the same number of pieces of clothing!
Sewing
- Serge (or use a lingerie or knit stitch on a standard sewing machine) center front and center back seams. A straight stitch will not work for this as the seam will rip out during wear.
- Serge inseam in 2 steps. Start at the mid-point of the inseam and stitch toward the leg bottom. Then sew the second leg. (The reason for this 2-step process is that when starting the seam, the serger has a difficult time keeping the bottom fabric even). Or maybe it’s me?
This has probably taken 5 minutes of sewing time: You now have nearly completed the leggings and just need to add the elastic.
Attaching the Elastic
Sew the elastic using a zig-zag stitch. (You could use a coverstitch but I find that zig-zag works just as well and it’s much faster). As you can see in the following photo, the elastic needs to be slightly smaller or tighter than the waist, otherwise they won’t stay up. Mira and Cate are both pretty slim, so keeping them up is a problem if the rise is to short or if the elastic isn’t tight enough.
Finishing the Bottom
If using lycra or spandex, I usually leave the bottom unfinished. If using cotton-poly-stretch, a narrow rolled hem works well.
The other step I take is to secure the bottom of the seam with a few stitches. Or you can tuck in the serger threads. The purpose is to keep the bottom of the seam from opening during wear.
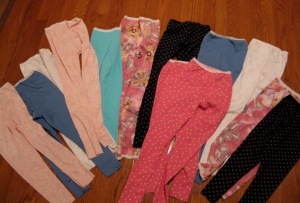
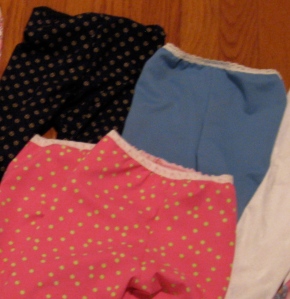
Here you see a photo of about a dozen pair I made a while ago.
 Leggings for Adults:
There are probably lots of ways to construct a leggings pattern for adults, however here’s what I did:
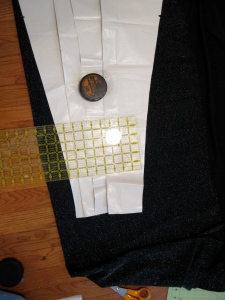
1. Take a pants pattern front and back and tape or pin together at the side.
2. Tuck or fold the pattern from top to bottom to reduce the width of the pattern. In this case, I aimed for the pattern to be 3/4 the size of my daughter’s actual measurements.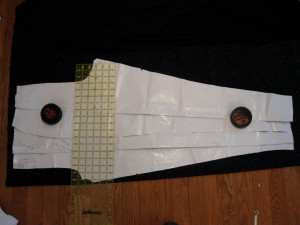
3. Shorten the rise so it is slightly shorter than the measurement of the person who will wear these.
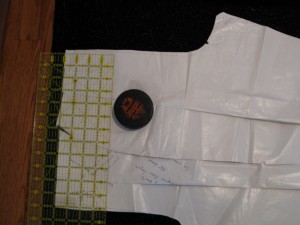 4. Narrow the width of the leg so it is slightly smaller than the actual measurement
5. Cut and sew in the same manner as the children’s leggings. If you have access to 1″ lingerie or fleece-backed elastic, it words well. I would stay away from the harsh elastic for general use.
Nice Hockey pucks
What a great tutorial — practical, fast, and it covers all the critical fitting points!
Leggings controversy aside, I often carry a pair of these with me when traveling in cold weather. They’re my pj bottoms (I need to be able to leave a hotel in the middle of the night decently clad, and without potentially freezing), and also liners for pants if the cold or wind get really bad.
We love those leggings! With all of your sewing skill, and all of the sewing that you do, the continuous supply of leggings for winter dress-wearing may be the garment that I appreciate most. Or maybe it’s the parade of floofy dresses from summer 2010…Thanks, Mom.
Thanks heaps for your pattern. I made my younger two 5 pairs of these last night. My only problem was my overlocker/serge machine. I think I used the wrong thread (fluffy nylon?) and it broke on one of the pairs of pants. The last 2 pairs I used the stretch stitch on my sewing machine and it seems to be holding up just fine.
The pattern was also easy enough to enlarge so that i could make my girls their pants (they are 7yrs and 9yrs)
thanks :)
I am off to put together the adults pattern now
So glad you enjoyed the pattern. If you email some photos, I will post them.
Thanks so much for the pattern and tutorial, this will be so great Christmas presents for my nieces! :-)
Your leggings pattern is exactly what I was looking for! I love it! Thank you so much for sharing :-)
Once the right store with good reputation is found, online
purchase can turn out to be a great experience that can be cherished
for several purchases. You will use the bottom edge for the bottom of your leggings since it
is narrower. It was originally worn by acrobats, dancers and gymnasts.
What about up sizing for a Big little girl? I have a niece who loves leggings but she is a big girl. Shes 8 and wears a 10-12 or 12-14 depending on cut and fabric.
I would add length to the rise and to the bottom of the leg. Then add width at the fold line, based on your niece’s hip size. Hope this helps.
Great website. A lot of helpful info here. I’m sending it to several buddies ans additionally sharing in delicious.
And naturally, thanks for your sweat!