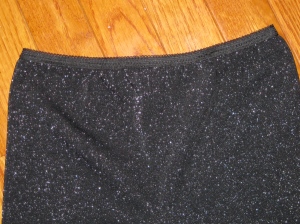
Sewing with Pre-ruffled Fabric: Part 2

IKEA Fabric for Valances and Pillows

In the two weeks since my last post, Kevin and I took a road trip to Wisconsin and Minnesota where we visited family and friends, and we saw Megan and Chris’s new home.  All of those miles traveled and I didn’t visit a single fabric store.  Well, just one.  However Megan and I did purchase fabric for window valances at IKEA.  Though the supply is limited, they have great fabric.

More tips for sewing with pre-ruffled fabric:

As I mentioned in the last post, sewing with pre-ruffled fabric was more challenging than I anticipated.  I stopped with tip #7, “Plan for where the ruffles will land on the garment”.  When cutting the black and white tank, I laid the pattern on the center front of the neck so that the entire ruffle would be visible.  That was the correct way to cut, unlike Deb’s tank where I cut in the middle of the ruffle.

Ruffle at center front of neckline is positioned correctly

In the following, I didn’t plan well and cut through the ruffle.  Fortunately I was able to recover by adding a piece of ruffle to the neckline before binding the edge.

Center front ruffle was cut away. Oops, but a little patch fixed it.

8.  Like with other stretchy garments, sew a small piece of stretch fabric or clear elastic into the shoulder seam.  Because the fabric is so lightweight and to avoid bulk, I didn’t extend the stabilizing fabric to the edges.  My choice was a small strip of cotton jersey.

9.  To bind the edges, use a very light weight fabric.  Again, I used cotton jersey with 4-way stretch.  BTW, white looked awful on the black and white fabric.

Sewing a strip of neck binding
Turn the binding over and topstitch
Another binding: 1" wide fabric was folded and serged onto the dress. No topstitching.

When the garments we sew are worn, we always learn more about our creations.  And thus a few more tips:

10.  When planning for an adult skirt, cut the fabric width approximately the same size as the wearer’s hip measurement.  Children don’t mind having a little extra bulk on their hips but it’s not as flattering for adults.  (I am now making this adjustment to Angela’s and Megan’s skirts).

11. Last of all, I learned that some of these fabrics may not work for children’s clothes.  At age 5, Catie proudly wore her new skirt to the playground.  After she went down the slide a few times the edge of the ruffles started to ravel (or unravel if you chose).  I don’t know if this would occur with the more commonly available poly or poly/nylon pre-ruffled fabric (i.e. black and white tank).  The grey ruffles feel like they are made from rayon, are softer and less stable.  It’s hard to be sad about the skirt as it was fun to sew it.   I’ll make her a new one from the yet unused black fabric.

Did I mention that  I paid $8.00 for all of the fabric for these garments.  It was great fun to find such cute fabric for such a bargain and to plan for the garments; but it was frustrating at times until I learned the nuances of working with pre-ruffled fabric.  

What are your experiences in working with this fabric?

Ruffled by Pre-ruffled Fabric

For some months I have been enamored by the pre-ruffled fabric which is common in ready-to-wear garments and which is sometimes but not often seen in the sewing circles.  Surely it’s not a product I’ve been able to find at the name-brand sewing and craft stores.  So when I found four pieces of pre-ruffled fabric in a bin at Jomar’s recent half-price sale, I was thrilled.  That is until I began to make garments from it.

Since I struggled to learn how to work with this unusual fabric, it’s only fair to share some tips with you. With about four yards of fabric in hand and because several pieces were 72″ wide, I was able to make one garment for each of the girls in our family – six in all.  So now we’re all dressed in grey and black.

Cate's skirt - wide twill elastic on a single piece of rectangular fabric.
Mira's jumper/sleeveless dress. Learned that its tough to make anything other than a straight skirt.
My tank top. Edges are finished with black jersey.
Deb's tank top. This is tapered but the effect is lost with the ruffles.
Angela's skirt - slightly longer. Waistband of black wide elastic.
Megan's skirt. Yoke top made from black jersey and has 3/4" elastic at the waist (no zipper)

10 Tips for Sewing with Pre-ruffled Fabric:

1. Use simple designs, preferable with straight lines.  The easiest and best look is to cut a rectangle of fabric and add a waistband to the fabric.  Absolutely avoid darts or multiple seams.  Even a tapered tank was more design than this fabric could handle.

2.  Pin the ruffles in place prior to cutting as it’s really easy to remove a part of a ruffle that you’ll want later.

For this skirt, I sewed the elastic and then pinned the ruffles in place before cutting.

3. Because the backing fabric is made from nylon knit (think nylon stockings), it runs.  Avoid pulling the fabric.  Even removing stitches created runs in the fabric.

4.  Machine baste all seams before placing the final seam (yes, that means all).  I made the mistake of trying to sew the edging without basting first.  When I removed the stitching it was a real mess.

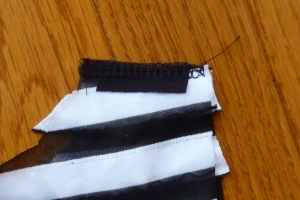
5. Plan for the garment to be longer than you desire.  Shortening is easy – just cut the nylon backing between the ruffles.  Couldn’t be easier.

Fabric back - easy to hem by cutting away what you don't need. No other finishing is required.

6. When cutting, match the stripes perfectly.

7. Plan for where the ruffles will land on the garment.  Here’s an example of a time when I cut away part of the ruffle.

Center front ruffle was cut away. Oops, but a little patch fixed it.

I have more, but since the hosting site isn’t cooperating, I’ll have more tips in the next post.  Stay tuned!

Post-publication note:  Part 2 is here

The Traje in Guatemala

It’s now been months since we were in Guatemala, but as you can tell by my posts, I continue to be fascinated by the culture.  By no means am I an expert on the “traje”; that is the traditional clothing worn by Mayan women and girls in Guatemala however I’d like to share the little bit that I know. As a fabric lover, it is captivating to see the variety of beautiful fabrics and the proud manner in which women wear their traje.

With her Mother at a Craft Market (Antigua)
Coban: Traje Store

In a previous post I wrote that women of Guatemala literally wear their culture on their backs.  Unlike other countries where traditional clothing is a cultural marker and where the clothing is worn only for special occasions, in Guatemala there are large numbers of women or girls who wear traditional clothing for daily life.  Of course there are also women who also wear the traje only on special occasions.  From what I could see, the clothing for special occasions does not differ in style from what was worn for daily use.

Selling fruit at the Market
Typical dress in Coban

Even after seeing several photos of women in traditional clothing, you may notice the different skirt and top styles.  Each community has a style which is unique to that area.  For example, in the north (specifically Coban), women wear gathered skirts and lacy tops such as the preceding photo.  On the other hand, in a cooler area such as Santiago Atitlan, the blouses are made of fairly heavy cotton which is then embroidered with birds such as the following photo.

Santiago Atitlan: Typical Blouse

 In Antigua and the Lake Atitlan area, skirts are made from a large panel of fabric tied at the waist with a wide hand embroidered belt.  The fabric is made by women in their homes – densely woven Guatemalan cotton in a variety of plaid designs, which also vary by region.   Like backstrap weaving, fabric weaving is one of the ways in which women stay connected to their culture.

San Juan: Schoolgirls in the Traje
Weaving Loom for Skirt Fabric
Fabric for Traje skirts
Lace only fabric store: San Pedro

In the following photo, I love the hair ribbons woven into the braid.  In Quetzaltenango the skirts are full and have an embroidered band at the knee.  You can also see the hand-woven shawl resting on the woman’s shoulder.

Waiting for the Bride: Quetzaltenango

Not surprisingly in this craft-based economy, many of the garments are hand-sewed and embroidered by family members.  I’m not sure about the cost of blouse fabric but we were told that a skirt-length panel of woven fabric costs $40-$80, incredibly expensive in a very poor country.

What about men?

Unlike Mayan women, it is uncommon to see men wearing their traditional garments.  I was able to capture one example in San Pedro – wool pants with embroidery.  Like with the garments worn by females, the designs vary by community.

Traditional pants: San Pedro

Cute is Always a Hit

Cute  adj

 1. a. clever or shrewd often in an underhanded manner

b.  impertinent, smart alecky,  <don’t get cute with me>

2.  attractive or pretty especially in a childish, youthful, or delicate way

This is Megan is wearing her new “cherry skirt” I sewed for her.  The fabric is a lovely (cute) pindot cotton organza with embroidered cherries. I found it all gnarled and wrinkled in the bins at London Textiles.  Since this skirt was such a hit with my daughter, I thought you might like the pattern and instructions for this very easy drop-waist skirt.

Free Drop-waist skirt pattern pdf

You will need:

  • 1.5 yards of fabric (more if you’d like more gathering or a longer skirt length)
  • 1/4 yard of interfacing
  • 7-9″ zipper

Cut:

  • Yoke: 4 pieces.  Here’s the Drop-waist skirt pattern – one for the front, one for the back and one facing piece for each the front and back.  I used scrap fabric for the facing but a self facing would work as well.  This pattern is 33″ at the waist and 37″ at the bottom of the yoke.  If you need a different size, add to the fold line or the at the side of the yoke pattern.
  • Interfacing: 2 pieces – same size as the yoke pieces.
  • Skirt: 2 pieces.  I used a 20″ length of by 54″ wide.  Note:  Cut the length equal to the  finished skirt from waist to the skirt bottom, as it will allow a sufficient length for the hem.   If you would like more gathering, use more fabric.

Construction

1. Fuse or hand baste the interfacing to the front and back yoke (not the facing).

2. Sew one of the side seams of both the yoke (with interfacing applied) and the facing.  Leave the other open for the zipper.

3.  Sew one side seam of the skirt.  This will be the right side.  Leave left side open for now.

4. Gather the top of the joined skirt pieces.  If you are lining the skirt, gather the lining and skirt as one piece.

5. With right sides together, sew the gathered skirt to the yoke.  

6.  Sew yoke facing to the yoke at the waist.  Clip seams and press.

7.  Insert zipper  (I hand-picked an invisible zipper).  Instructions are here.

8.  Hand or machine stitch the bottom of the facing, to hide the gathered edge of the skirt.

9.   Sew the left side seam below the zipper.

10.  Hem the skirt.

Hopefully only two hours later and you have a new cute skirt.

Mira’s First PJ Pants

Previously I’ve blogged about the pleasure I get from having granddaughters who have an intense interest in all things  sewing.  When we visited over the Christmas holidays, I took with me some pre-washed flannel and a pants pattern with the hope that if asked, Mira would want to sew her first piece of clothing. When I made the offer to spend some special time sewing with Ramma (grandma – that’s me), she wanted to begin immediately.

Mira could hardly wait for me to cut the pieces and to pull out the sewing machine.  Following a safety review (hold your hands at each the side of the needle, never put your fingers under the needle, etc) she immediately began to sew the pieces together.  For each joining, I stood by her side but she guided the fabric and back-tacked at the beginning and end of each seam.  After each seam, amazed by her accomplishment, she ran upstairs to show her grandfather (fondly known as Racka) the progress.

Within an hour she had completed the pants including making the casing and pulling the elastic through with a large safety-pin. In fact drawing the elastic was quite fascinating for Mira’s 8 year-old inquisitive mind.

By this time her energy was waning so I quickly hemmed the legs.  Rightfully so, Mira was extremely proud of her completed project.  She put them on and ran to show her grandfather; later that day she was equally as thrilled to show her parents.


Mira took the completed pj’s to show her teacher the next day; she wore them as day clothing for several days and took them with her when visiting family and friends.  This weekend we visited again and the glow hasn’t worn off – yesterday she took the pj pants to a Superbowl Party so she could show them one of her aunts.

Nor has my glow worn off!


Giveaway: Upcycled Felted Wool Sweater

It’s Been a Year

It’s been a little over a year since I started this blog.  Thus far you could observe that I’ve been dabbling in a number of types of sewing.  It may seem that I’ve not immersed myself in one particular type of sewing – that’s because I do enjoy just about any type of sewing (excluding mending).  Over the years the type of projects seem to depend on what’s going on in my life.

Changes Ahead

Speaking of what’s going on in my life, I’d say we’re in a year of significant change.  I’m retiring in a month, we’re taking a 2 month trip to Central America, selling our home in Philly and moving back to the midwest.  How’s that for change?  It’s a little weird that I won’t use a sewing machine for 2 months and what about not getting up and going to work every day.  Sound good.  Oh, and I may need to send one or two machines to storage while we show our home.  Hmm, which can I part with?

Where is this going, you ask? It’s a long way of saying that I want you to stay with me while I am not posting about my sewing life.  In the months of March and April, I’ll replace sewing content with traveling content.  Maybe even a word or two of Spanish if my brain can soak up a few phrases.

Giveaways

I don’t want to lose you, my loyal followers.  To get you in the habit of visiting my blog while I’m away, I’m going to do a series of giveaways which are representative of my last year’s sewing.

The first one is your choice of three felted upcycled toddler sweaters.  All you need to do is to leave a comment indicating which one you’d prefer.  If you’re interested in making one of these in the future, ask a question about how to make the sweaters.  The deadline is midnight Monday, Jan 31; then the random number generator will work it’s magic.


Description:

1. Hooded Grey merino with snowflake design.

2. Wool and cashmere.   Sleeve, 1/2 of the front and the back are felted cashmere.  Oh, so soft.

3. Red wool Snowmen with wool/angora cabled sleeves.

Take 2: Adult Leggings Pattern (free)

I’ve received so many kind messages about my last post; a children’s leggings pattern and tutorial on how to make leggings or footless tights.  I also included directions on how to make a pattern for adult-sized leggings but stopped short of a pattern.

This week I made a pair for myself, as I’ll need them for our upcoming trip to Central America.  Why not create a pattern and share it with you?  The fabric is black/silver spandex – nylon and spandex or lycra, I think.  Since there was more stretch with the grain, I cut across the grain.  That is, the selvage ran across the top of the tights.

Leggings Pattern sz med pdf

First of all, here is the pattern, which is for an adult size medium.  This is “low tech” pattern making with hand written instructions.  All you need to do is to print the 10 pages in the Adult Leggings Pattern sz med pdf and tape them together following the grid on page 1 of the pattern.

Sizing Tips:

  1. In order to fit well and stay up, the hip size of the finished leggings is about 2/3 of my actual size.  The finished hip circumference is 28″ and my actual measurement is 40″.
  2. The legs are closer to my actual size.  At the top of the inseam, the finished leggings are 18″ circumference against my actual size of about 22″.
  3. At the ankle, the leggings circumference is 7 3/4″ against an actual ankle measurement of 8″.
  4. Length – my leggings inseam is 27″ which is 1″ shorter than my pants inseam.  You may need to lengthen the pattern as most of the world is taller than I am.  That’s just how it is!

If you need to alter the pattern, make a split down the middle of the pattern, which would be at the side seam (if there was a side seam).  As you can see from my’m hoping this will give you an idea of how much to split the pattern.  The nice thing about using lycra or spandex is that it’s forgiving and your measurements don’t need to be exact.

What about the Elastic?

As with children’s leggings, apply the elastic with a zig-zag stitch.  Pull the elastic so it is slightly smaller than the top of the tights.

Here are several more photos of the completed project – these are incredibly comfortable to wear and will be just what I need for our upcoming trip – they will double as tights, long underwear and maybe PJ’s too.

When I am an Old Woman I Shall Wear Purple – Unless I can Wear Cashmere

Having completed one coat this winter which didn’t wasn’t the ideal project, my need for mastery has kicked in, resulting in a decision to accelerate the plan to sew a wool coat for moi.  I love the cut of Simplicity’s Project Runway 2812 pattern and I  need a new wool coat but had planned to wait until next fall to take on this project.  Purple or royal blue were my colors of choice; black wool is easy to come by and black coats look great but this time I wanted color.  Maybe my desire to reject symbols of aging is related to my impending retirement or who knows?  No need to analyze but at least you know where my head is at these days.

Last week I searched the internet and sent for a few samples but on Friday I decided to make a run to London Textiles in New Jersey to take a look at their selection of coating.  London Textiles is a designer fabric wholesaler whose doors are thankfully open to the public.  If you’re even in the Philadelphia area on a weekday, I’d highly recommend a visit.  Their prices are amazing and they have bins of roll ends capable of enchanting a fabriholic serious sewer.

Purple or Royal vs Black Cashmere Coating

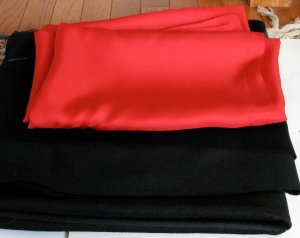
Not surprisingly, there were gorgeous coat-weight wools but no purple or royal blue.  Oh, but there was that roll of black Italian 100% cashmere that kept following me around the warehouse.  What’s more, the price was unbelievable – for cashmere that is.  I wandered around the store looking at gorgeous fabrics in search of the perfect silk lining and there it was – deep red silk.  The deal was sealed!  What an exciting find and how fun much fun will it be to work on cashmere.

Soon I will start indulging in this rich, luscious fabric.


Other Finds:

Stretch denim for a pair of Jalie jeans, navy wool knit for a cardigan, black wool gauze to use as an interlining for the coat.

My question for you:

What type of buttons should I use on this coat?  Leave me a comment with your suggestion – either a general suggestion or a specific button.  Also, if you’ve worked on cashmere, I’d love to hear your tips on interfacing, underlining, etc.

The Coat that Didn’t Want to Be

Oh, how the temptation of beautiful yet inexpensive fabric can be the start of a bad idea.  In the past few months I’ve gotten a major lesson on how not to make a coat.  The impulse idea started on a trip to Jomar, where I saw a really large bolt of lovely basket-weave wool coating in a light teal – Megan’s favorite color.  When I say “large”, I mean that it was 30″ in diameter.  That should have been the first clue but the little devil in my head said “buy it, Megan will love it”.  After all she lives in Minneapolis where you need a really warm winter outer garment.  I hadn’t sewed a coat in years and was eager to give it a go.


On a nearby table I found a bolt of burgundy Asian-design satin which would make the perfect lining.  The deal was sealed.  I walked out of the store with a massive yellow bag of fabric and less than a $50 drain on my wallet.  Not bad.


Before I whine too much, here’s a photo of the finished coat.  Megan was absolutely thrilled which of course, made it a worthwhile project.  In fact, today I received a thank you note in the mail with something like “I loooooooooove my new coat”.

Q. What went wrong?

A. Everything.

1. Underlining with haircloth.  Because the wool didn’t have much structure (truthfully because I wanted to try haircloth) I hand-stitched haircloth to each piece of the garment, minus the seam lines.  Doesn’t it feel good to brainlessly hand-stitch while watching a movie or two? Later when the sleeves looked like Hulk Hogan’s arms, I removed the underlining from the sleeves.  What was I thinking?

2. Underlining with haircloth. That stuff is itchy beyond anything I’ve ever experienced.  It provides structure but those little fibers are mean-spirited.   Fearful that the hair would poke through the lining and drive Megan crazy, I underlined the lining with a layer of a densely woven lightweight silk from my stash.  That seemed to work well but it was an unexpected additional step.


3. Buttonholes: With this thick fabric, choosing a buttonhole style was quite a feat.  After failing with bound and machine sewed buttonholes, I sought advice from my fellow sewists on PatternReview.com. I might add that the sample bound buttonholes were a most ridiculous looking specimen with big bulges because of the volume of fabric.  In the end, I used a technique called Spanish Snap Buttonholes.  The Sewing Lawyer has a terrific tutorial which was very easy to follow.  Instead of using wool, I used the lining to back the buttonholes, which provided a nice design element.  Honestly, it might have been the only suitable option.

Buttonhole or a weak smile?

4. Buttons with irregular edges and shapes: Because the chosen buttons had uneven edges, I worried about the buttons shredding the satin lining around the buttonholes.  To mitigate this, I dyed a piece of silk organza to match the lining, and added the organza as an additional layer over the satin lining pieces.  In addition I sanded the bottom of the buttons, which were composed of some type of recycled material.  Also, one button was about twice as thick as the others and wouldn’t go through the buttonhole.  Lucky that six were purchased and five were needed.


5. Sizing: For some reason the coat came out much larger than the lining, even though both were cut from the same pattern pieces.  I think the wool stretched even though it was underlined.  This threw me over the edge.  I quit working on the coat and spent about 2 weeks making leggings and other clothing for my 2 GD.  At least I knew what I was doing.  After I was over my huff, I made the needed alterations, again sewing through those thick seams. In the end the coat sizing matched the lining.  Whew!

6. The Collar: As I mentioned previously, the fabric was too thick for either of my sewing machines.  In addition there was gathering in the collar which made it even thicker.  I ended up hand sewing the lining to the collar.  It looks good – hope it wears well.

All worked out in the end.  What advice can you offer me?

Why not Mosquito Netting?

Several weeks ago after she posted a comment on my blog, Dhilma and I shared a few sewing related email messages.  She is a physician working in Sri Lanka as a lecturer and like many of us, has a passion for sewing.   She was very interested in making a crinoline for her niece.  So before I posted a child’s crinoline pattern, several weeks ago, I sent the pattern to her.

A few days ago I received a very kind email from Dhilma – I could feel the excitement in her message.  With her permission, here is an excerpt:

“I really enjoyed making it [crinoline] and then admiring the end result! In our country (Sri Lanka) tuille is very expensive and so I used cheap mosquitoe netting which I bought at SLR110 (less than $1.00) per yard (60 inch width)I used the whole yard that I bought and some poplin (cotton material) for the short lining and the band at the waist. I am sure my niece is going to strut around in this petticoat alone so I plan to embelish it with some shiny sequins.”

Now isn’t that an absolutely brilliant idea?  Why not use mosquito netting instead of tulle?  For some of us it might be as difficult to obtain mosquito netting as it is for Dhilma to get tulle.  Oh, and never mind that for those of us in the North, mosquito netting is the last thing on our mind right now – maybe thick wool or a fleece throw for those of us in the deep freeze?

The real point is that sometimes we need to improvise and if we allow our creativity to rule, it will work out just fine. Thank you Dhilma for reaching out and for sharing your beautiful creation.  It is absolutely adorable and I am sure your niece will love it.